 how-to
How to Anchor a Metal Carport to Concrete
Table of Contents
- Understanding Concrete Anchors for Metal Carports
- Tools and Materials Needed for Carport Anchoring
- Preparing Your Metal Carport Foundation
- How to Install Wedge Anchors in Concrete
- Safety Precautions for Drilling Concrete
- Post-Installation Inspection and Maintenance
- Common Anchoring Mistakes to Avoid
- Frequently Asked Questions
Last Updated: October 2, 2026
Understanding Concrete Anchors for Metal Carports
Learning how to anchor a metal carport to concrete is essential for structural integrity and safety. High winds, snow loads, and the weight of the structure itself create forces that can shift or topple an unanchored carport. Proper anchoring keeps your investment secure and protects whatever you park beneath it.
The right anchor prevents movement while distributing loads evenly across the foundation.
Wedge Anchors vs. Sleeve Anchors
Wedge anchors are the most common choice for metal carport installation. They work by expanding a wedge inside the concrete hole, creating outward pressure that locks the anchor in place. As you tighten the bolt, the wedge spreads, gripping the concrete walls tighter.
Wedge anchors excel at resisting pull-out forces and are recommended by most carport manufacturers.
Sleeve anchors expand around the bolt as you tighten it and are easier to remove, making them popular for temporary installations.
For permanent installation, wedge anchors provide superior hold-down strength.
Anchor Sizing and Specifications
Anchor size depends on your carport dimensions, local wind loads, and concrete strength. A typical residential carport uses 3/8-inch or 1/2-inch diameter anchors. Larger structures or areas with high wind requirements may need 5/8-inch anchors. Heavy-duty mechanical fasteners provide the most reliable hold for permanent installations, though alternative methods for securing structures on concrete exist for situations where drilling into the slab is not an option.
Check your carport's engineering documentation for anchor specifications. It should list:
- Required bolt diameter
- Minimum embedment depth (how deep the anchor sits in concrete)
- Spacing between anchors
- Minimum concrete strength (usually 2,500 PSI or higher)
Never guess on anchor sizing. Using undersized anchors risks structural failure. Oversizing wastes money but causes no safety issues. When in doubt, go larger.
Tools and Materials Needed for Carport Anchoring
Essential tools:
- Hammer drill with concrete bits (carbide-tipped, matching your anchor diameter)
- Impact wrench or socket wrench for torquing bolts
- Measuring tape and pencil for marking hole locations
- Safety goggles and dust mask
- Torque wrench (to ensure proper tightening)
- Level to verify carport alignment
- Concrete anchors (wedge or sleeve type, sized per specifications)
- Galvanized bolts, washers, and nuts
Materials:
- Concrete anchors (quantity per your carport plan)
- Stainless steel or galvanized bolts with matching washers and nuts
- Shims (metal or composite) for leveling if needed
- Grout or concrete patching compound for filling holes after installation
A hammer drill is essential; standard drills lack the percussive force needed for concrete.
Preparing Your Metal Carport Foundation
Before drilling a single hole, your foundation must be ready. A weak or improperly prepared concrete slab will fail to hold anchors securely, regardless of how well you install them.
Concrete Slab Thickness Requirements
Most residential carports require a concrete slab at least 4 inches thick, which provides adequate depth for anchor embedment.
Larger structures or heavy snow load areas may require 6-inch slabs; check local building codes.
Wait at least 28 days after pouring before installing anchors.
Assessing Concrete Quality and Strength
Concrete strength matters enormously. Anchors perform best in concrete with at least 2,500 PSI (pounds per square inch) compressive strength. Weaker concrete won't grip anchors securely.
Signs of weak concrete include soft surfaces that dent easily, spalling or crumbling, and large cracks or missing chunks.
If you have serious doubts about concrete quality, consult a structural engineer. The cost of professional assessment is far less than replacing a failed carport installation.
How to Install Wedge Anchors in Concrete
Installation follows a straightforward sequence, but precision matters at every step. Rushing through the process creates weak connections that may fail under wind or snow load.
Drilling Holes to the Correct Depth
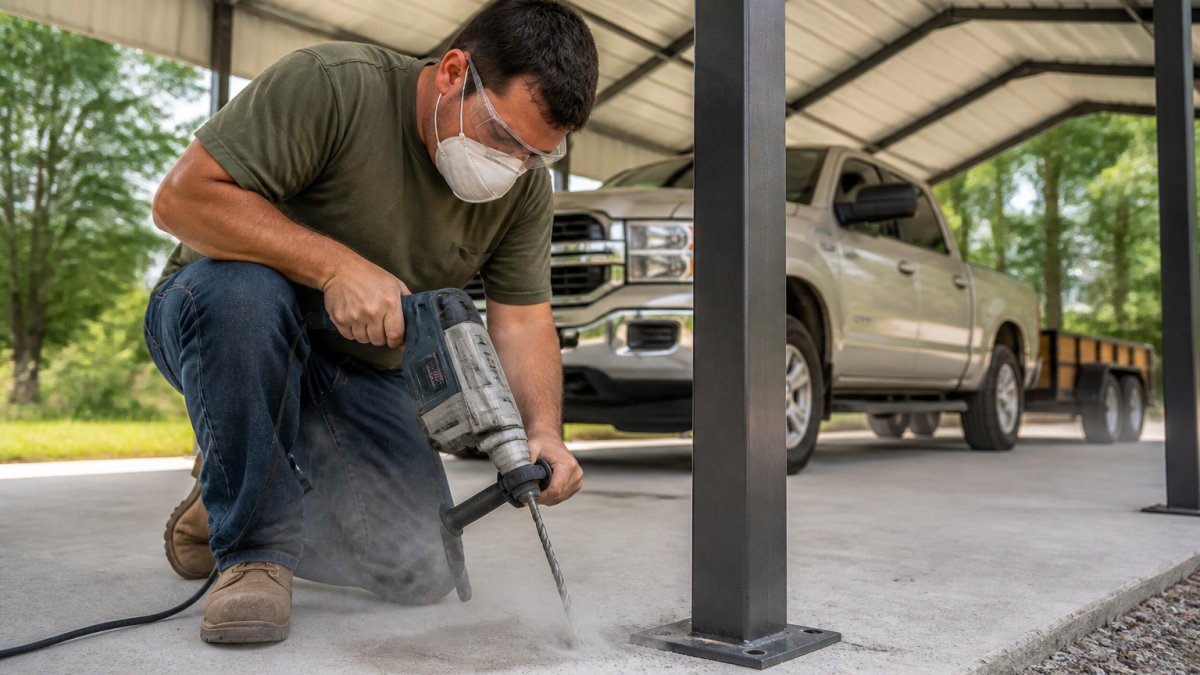
Mark hole locations from your carport's base rail. Drill perpendicular to the concrete surface using a level to verify alignment.
Embedment depth is critical; most 3/8-inch anchors require 2.5 to 3 inches. Use a carbide-tipped bit, drill slowly with steady pressure, and vacuum all dust from the hole before inserting the anchor.
Inserting and Torquing Anchors
Insert the anchor, place a washer on the bolt, and thread the nut by hand until snug. Use a torque wrench to tighten to manufacturer specification (typically 30-50 foot-pounds for 3/8-inch anchors, 60-80 for 1/2-inch). Stop when the wrench clicks; additional tightening can strip the bolt or crack concrete.
Safety Precautions for Drilling Concrete
Concrete drilling creates hazards that are easy to overlook. Proper safety practices prevent serious injury.
Wear a dust mask rated for concrete particles, safety goggles, hearing protection, and sturdy boots.
Post-Installation Inspection and Maintenance
Installation is only the beginning. Regular inspection and maintenance catch problems before they become dangerous. This section provides a detailed maintenance schedule and a visual troubleshooting guide for common failure modes.
Initial Inspection (Within 24 Hours)
Within 24 hours, verify all bolts are tight with a torque wrench, check that the carport is level in all directions, inspect concrete for cracks wider than 1/4 inch, and verify washers are seated flat.
Seasonal Maintenance Schedule
Spring: Retorque all bolts and inspect concrete for new cracks. Summer: Inspect bolts for rust or corrosion. Fall: Retorque all bolts before heavy snow season. Winter: After storms, inspect anchors for looseness and retorque if needed.
Post-Storm Inspection Protocol
After severe weather, verify all bolts are tight, check for new cracks in concrete, and retorque if needed.
Long-Term Maintenance (Annual and Beyond)
Annually: Retorque all bolts, inspect concrete for cracks, and check for rust. Every 3-5 years: Replace corroded bolts and have concrete tested if deterioration is suspected. Coastal areas: Inspect every 6 months and consider upgrading to stainless steel bolts.
Visual Troubleshooting Guide
Loose bolt: Retorque to specification. If it loosens again, clean the hole and reinstall. Cracked concrete: Hairline cracks are normal; cracks wider than 1/4 inch indicate poor seating or weak concrete. Loosen, clean, and retorque. Bolt spins: Remove debris with a shop vacuum, inspect the anchor for damage, and reinstall. If it still spins, the hole may be oversized; use a larger anchor or fill with epoxy repair compound. Rust or corrosion: Light surface rust is normal; deep pitting requires replacement. Shifted carport: Shifts less than 1/4 inch are normal settling. Larger shifts require shimming and retorquing. Spalling concrete: Monitor minor flaking; significant chunks indicate deterioration requiring professional assessment.
Corrosion Management by Climate
Dry climates (low humidity, minimal salt exposure):
- Galvanized bolts are adequate.
- Inspect annually for surface rust.
- Replace only if deep pitting develops.
Humid climates (high humidity, no salt):
- Galvanized bolts are adequate but will show more corrosion.
- Inspect every 6 months.
- Replace bolts every 5-7 years or if significant pitting develops.
Coastal or high-salt-exposure areas:
- Upgrade to stainless steel bolts and washers immediately. The extra cost ($50-$150 per carport) is far less than replacing corroded hardware or dealing with structural failure.
- Inspect every 3-6 months.
- Even stainless steel can corrode in extreme salt exposure; rinse with fresh water after salt spray events.
Common Anchoring Mistakes to Avoid
Most installation failures trace back to a few preventable errors. Learning from others' mistakes saves time and money.
| Mistake | Consequence | Prevention |
|---|---|---|
| Undersized anchors | Structural failure under wind load | Follow carport specifications exactly |
| Shallow embedment | Anchors pull out | Drill to full specified depth |
| Dirty holes | Poor anchor seating | Vacuum all dust before insertion |
| Overtightening | Cracked concrete or stripped bolts | Use torque wrench, stop at specification |
| Unlevel installation | Uneven load distribution | Check level before final tightening |
| Wrong anchor type | Weak connections | Match anchor type to engineering specs |
Frequently Asked Questions
What type of anchor is best for a metal carport on concrete?
Wedge anchors are typically the best choice for anchoring metal carports to concrete. They provide excellent pull-out strength and are designed to withstand the wind loads and structural stresses a carport experiences. Sleeve anchors work well in certain conditions but wedge anchors offer superior expansion and holding power in solid concrete. Your choice depends on concrete quality, bolt diameter, and the specific wind load requirements for your structure.
How deep should concrete be for a carport anchor?
Concrete slab thickness should be at least 4 inches for reliable anchor installation, though 6 inches or deeper is preferable for maximum structural integrity. The embedment depth of the anchor itself typically ranges from 2.5 to 3.5 inches depending on anchor size and concrete strength. Thicker concrete provides better load distribution and corrosion resistance, especially important in areas with moisture exposure. Always verify your local building code requirements, as some jurisdictions specify minimum slab depths based on wind load calculations.
Can I anchor a carport to concrete without professional help?
Yes, you can anchor a carport to concrete yourself if you have the proper tools and follow correct procedures. You'll need a hammer drill, masonry bits, appropriate anchor bolts, an impact wrench, and safety equipment. The process involves drilling holes at precise depths, inserting anchors, and torquing bolts to specification. However, if you're unfamiliar with torque specifications, concrete assessment, or local building codes, professional installation ensures your structure meets safety standards and code compliance.
How many anchors are required for a standard metal carport?
Most standard metal carports require a minimum of 4 anchors, one at each corner of the base rail. Larger carports or those in high-wind areas may require 6 or more anchors for adequate structural integrity and wind load resistance. The exact number depends on carport dimensions, local wind load requirements, and your specific structure's engineering specifications. Your carport's engineered drawings will specify anchor placement and quantity needed to meet code requirements for your area.