 how-to
How to Prepare Site for Metal Carport: 7 Steps
Table of Contents
- Step 1: Assess Your Site and Check Local Requirements
- Step 2: Obtain Building Permits and Zoning Approval
- Step 3: Call Before You Dig, Locate Underground Utilities
- Step 4: Clear the Site of Debris and Vegetation
- How to Level Ground for Carport Installation
- Metal Carport Foundation Requirements and Options
- Carport Site Preparation Checklist
- DIY vs. Professional Site Prep: What to Know
- Frequently Asked Questions
Last Updated: September 27, 2026
Preparing your site for a metal carport installation is critical for a stable, long-lasting structure. Proper site preparation prevents costly failures down the road.
This guide walks you through how to prepare site for metal carport installation step by step. You'll learn what local codes require, how to locate underground utilities safely, and which foundation type works best for your soil conditions.
Step 1: Assess Your Site and Check Local Requirements
Before breaking ground, understand what your property can support and what your local government requires. This step prevents costly mistakes later.
Walk your property and identify the exact location, noting slope, drainage patterns, and obstacles. Take photos from multiple angles for reference.
Check your local zoning codes and building department requirements. Most jurisdictions require permits for carports over 200 square feet, with specific setback requirements from property lines and roads.
Call your local building department directly. Ask about:
- Permit requirements for your carport size
- Setback distances from property lines
- Wind load and snow load requirements for your region
- Whether engineered drawings are needed
- Foundation depth requirements for your soil type
Step 2: Obtain Building Permits and Zoning Approval
Unpermitted structures create insurance gaps, complicate sales, and risk fines or removal orders.
Contact your local building department and request a permit application for carport installation. Provide your site plan showing the carport location, dimensions, and distance from property lines. Many departments now accept online applications.
You'll typically need:
- Site plan or survey showing property lines and carport placement
- Carport dimensions and height
- Engineered drawings (if required)
- Proof of ownership or authorization to build
Processing time varies from 2-6 weeks depending on location.
Once approved, you'll receive a permit number and inspection schedule. The building inspector will visit at key stages: before site prep begins, after foundation work, and after final installation. Keep your permit on site during work.
Step 3: Call Before You Dig, Locate Underground Utilities
This step is non-negotiable for safety and cost. Hitting a water line, gas line, or electrical conduit creates emergencies, liability, and expensive repairs.
Contact your local one-call utility locating service at least 2-3 days before excavation. The locator will mark buried utilities with paint or flags.
Common utilities to locate:
- Electrical lines
- Natural gas lines
- Water mains and service lines
- Sewer or septic lines
- Telecommunications cables
Take photos of marked utilities and share with your installation crew to avoid digging in marked areas.
Step 4: Clear the Site of Debris and Vegetation
A clean site is a safe, level site. Remove anything that will interfere with installation or compromise drainage.
Clear the area: remove trees, shrubs, stumps, weeds, rocks, and debris. Mow tall grass short. Hire professionals for large trees; stump grinding prevents settling and drainage issues.
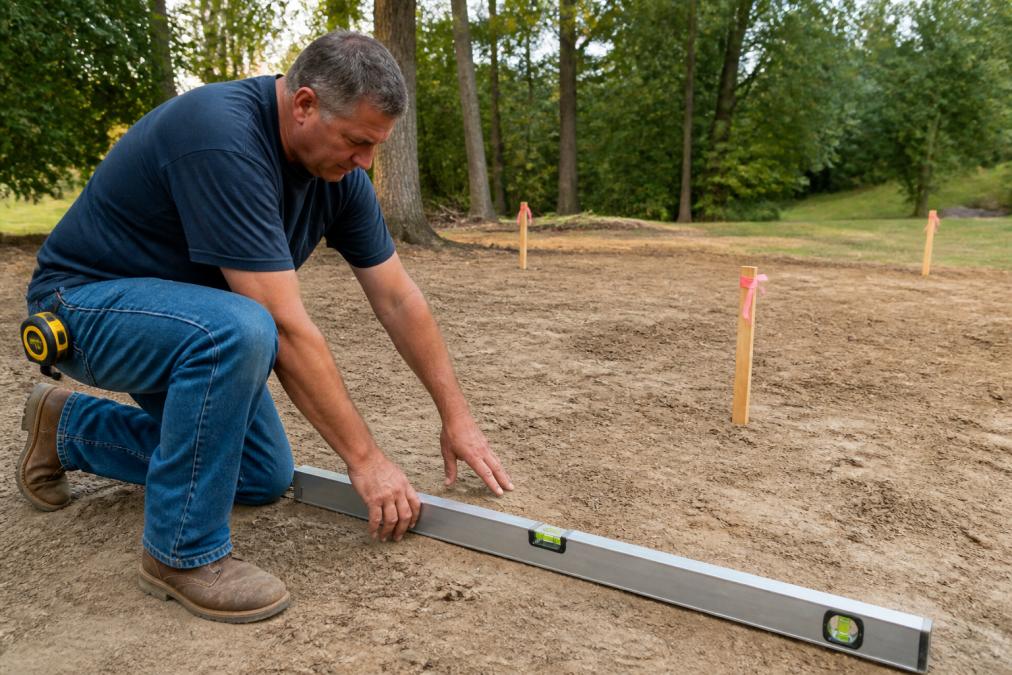
How to Level Ground for Carport Installation
Proper leveling prevents structural stress, water pooling, and ensures stable drainage.
Understanding Soil Types and Stability
Different soil types behave differently under load. Knowing your soil type helps predict how your foundation will settle and what drainage challenges you'll face.
Soil Compaction Testing
Loose soil causes settling, cracking, and structural movement. Compact soil in 4-6 inch layers using a plate compactor (rent from equipment shops). Test by jumping on the area, if it gives way, compact more. For large projects or clay-heavy soil, hire a professional grading contractor.
Metal Carport Foundation Requirements and Options
Your foundation type determines durability, cost, and installation timeline. Choose based on your soil conditions, local codes, and budget.
Concrete Slab Foundations
A concrete slab is the gold standard for carport foundations. It provides superior stability, excellent drainage control, and long-term durability.
A typical concrete slab for a carport:
- 4 inches thick
- Reinforced with rebar or wire mesh
- Sloped slightly (1/8 inch per foot) for drainage
- Anchor bolts embedded for carport post attachment
Gravel Pad and Dirt Foundations
Gravel pads work in dry climates with stable soil and no frost heave concerns. A gravel foundation requires:
- 4-6 inches of compacted gravel
- Proper drainage sloping away from the structure
- Regular maintenance to rake and re-compact
Dirt foundations (compacted earth with no concrete or gravel) are the most economical but least durable option. They work only in very dry regions and require excellent drainage.
Anchoring and Load-Bearing Considerations
Anchoring ties your carport to the foundation and prevents wind uplift. Proper anchoring is critical, especially in high-wind regions.
Load-bearing capacity depends on:
- Foundation type and thickness
- Soil compaction and stability
- Anchor bolt spacing and size
- Regional wind and snow loads
Carport Site Preparation Checklist
Use this checklist to track your site prep progress and ensure nothing is missed.
| Task | Status | Notes |
|---|---|---|
| Check zoning codes and setback requirements | ☐ | Contact local building department |
| Obtain building permit | ☐ | Keep permit on site during work |
| Call one-call utility locating service | ☐ | Mark all buried utilities |
| Clear debris, vegetation, and obstacles | ☐ | Remove stumps and roots |
| Assess soil type with test hole | ☐ | Sandy, clay, or loamy? |
| Stake and mark carport perimeter | ☐ | Use string and stakes for accuracy |
| Check ground slope and identify low spots | ☐ | Use a level to measure slope |
| Compact soil in layers | ☐ | Use mechanical compactor if DIY |
| Arrange concrete pour or gravel delivery | ☐ | Schedule before installation |
| Final site inspection by building official | ☐ | Required before installation |
DIY vs. Professional Site Prep: What to Know
When DIY Site Prep Makes Sense
DIY site prep works if:
- Your property is relatively flat and accessible (slope under 5%)
- Soil conditions are straightforward (loamy, not clay-heavy)
- You have 2-4 weekends available to rent equipment and do the work methodically
- Your local code allows homeowner-performed preparation (some jurisdictions require licensed contractors)
- Your carport is single-car or small (under 400 square feet)
- You're comfortable renting and operating equipment like plate compactors
When Professional Site Prep Is Worth the Cost
Professional site prep is better if:
- Your property has significant slope (over 5%) or drainage challenges
- Soil is clay-heavy and requires expert moisture assessment and compaction
- Your carport is large (over 400 square feet) or multi-car
- You want guaranteed code compliance and documentation for building inspection
- You lack equipment, experience, or physical ability to do the work
- Your local code requires licensed contractor sign-off
- Your region has frost lines deeper than 24 inches (common in northern climates)
Regional Climate Considerations
Frost-line regions (northern climates, USDA zones 4-6): Frost lines often extend 24-48 inches deep. Soil expands and contracts with freeze-thaw cycles, causing heave and settling. If you're pouring concrete, it must extend below the frost line or sit on a properly compacted, drained sub-base. Clay soils in these regions are particularly tricky. Professional compaction and drainage design are strongly recommended. DIY is possible but requires careful attention to moisture management and compaction depth.
The Hybrid Approach: Best of Both Worlds
- You do: Clear debris, vegetation, and stumps. Remove rocks and roots. Mow and rake the area smooth.
- Professional does: Assess soil type, compact in layers, test compaction adequacy, ensure proper slope and drainage, and provide documentation for building inspection.
Decision Checklist
Use this to decide:
- Is your soil clay-heavy or unknown? → Professional
- Is your property slope over 5%? → Professional
- Is your carport multi-car or over 400 sq ft? → Professional
- Is your region frost-line or high-wind? → Professional or hybrid
- Do you have 2+ weekends free? → DIY or hybrid possible
- Is your soil loamy and property flat? → DIY feasible
- Do you want building-inspector confidence? → Professional or hybrid
Frequently Asked Questions
How level does the ground need to be for a metal carport?
Your site should be graded to slope no more than 1-2% for proper drainage. Minor variations of a few inches across the entire footprint are acceptable, but significant slopes or depressions can compromise structural integrity and water drainage. If your ground slopes more steeply, you'll need to level it or use adjustable anchor bolts during installation. The exact tolerance depends on your local building codes and the specific foundation type you choose.
What is included in a metal carport site preparation checklist?
A complete carport site preparation checklist should include: marking the perimeter and staking out corners, clearing all vegetation and debris, checking for underground utilities, assessing and leveling the ground, testing soil compaction if required by code, obtaining building permits, measuring and confirming final dimensions, and verifying drainage patterns. Having this checklist completed before installation begins ensures a smooth, code-compliant installation and prevents costly delays or corrections after the structure arrives.
Do I need a concrete slab for a metal carport foundation?
No, a concrete slab is not always required. Your metal carport can be installed on a concrete slab, gravel pad, or compacted dirt, depending on your local building codes, soil conditions, and wind/snow load requirements. Concrete provides the most durable, long-term solution and is often required in high-wind or high-snow-load areas. Gravel pads and dirt foundations work in stable soil conditions but require proper compaction and drainage. Your local building department and the structure's engineering specifications will determine which foundation type is appropriate for your site.
How are metal carports secured to the ground?
Metal carports are anchored using anchor bolts, concrete footings, or ground anchors driven into the earth, depending on the foundation type. On concrete slabs, anchor bolts are embedded and bolted directly to the base rails. On gravel or dirt, ground anchors or driven anchors secure the posts into compacted soil. High-wind and high-snow-load regions require deeper footings and stronger anchoring systems certified to local building codes. The installation crew will use engineered drawings specific to your location to ensure proper anchoring for your site's wind and snow load requirements.
Proper site preparation is the foundation of a durable carport. Taking time to level ground, compact soil, and arrange the correct foundation type prevents costly problems down the road. Metal Carport Depot LLC handles site preparation and professional installation at no extra charge across 37 states, with engineered designs specific to your local wind and snow loads. Call 1-800-324-5315 to discuss your carport project and get started with a structure built to last.