 how-to
5 Steps to Measure Your RV for a Carport
Quick Summary
To measure RV carport dimensions, record the overall height to the highest fixed point, including roof air conditioners and antennas, then the bumper-to-bumper length and width with mirrors and slides included. Add safety clearance to each number before choosing a size. Confirm the entrance opening height with the manufacturer, since framing can make it lower than the listed leg height.
- Measure overall height from ground to the highest roof item, including the air conditioner.
- Measure width three ways: mirrors folded, mirrors extended, and slide-outs open.
- Add at least 12 inches of total side clearance for pulling in without touching posts.
- Add 6 to 12 inches of height clearance above your RV's highest point.
- Confirm the entrance opening height with the manufacturer, not just the leg height.
Table of Contents
- Why Accurate RV Measurements Matter Before You Order
- Step 1: Measure the Overall Height of Your RV
- Step 2: Measure the Overall Length and Allow for Access
- Step 3: Measure Width Including Mirrors and Slide-Outs
- Step 4: Add Safety Clearance and Plan Your Carport Height
- Converting Your Measurements to Standard RV Carport Dimensions
- Verifying Your Measurements and Site Conditions Before Ordering
- Get Your Custom-Sized RV Carport Quote Today
- Frequently Asked Questions
5 Steps to Measure Your RV for a Carport
Last Updated: October 29, 2026
Why Accurate RV Measurements Matter Before You Order
Ordering a carport that is too small wastes money and time. Our guide to protecting an RV from sun damage explains why a properly sized cover matters for long-term protection.
A common mistake is to measure only the length of the RV and skip everything else. The overall height, the roof equipment, and the extra room needed to drive in all get left out.
Before you start, gather a tape measure, a pen, and a notepad. A helper makes the job faster. Plan on about 30 minutes for the whole process.
- Measure with the RV parked on level ground
- Remove or note any items that stick out from the roof
- Record every number in feet and inches
Step 1: Measure the Overall Height of Your RV
Overall height is the distance from the ground to the highest fixed point on your RV. That point is often the roof air conditioner, not the roofline. Carports generally need to clear this full height, so start here.
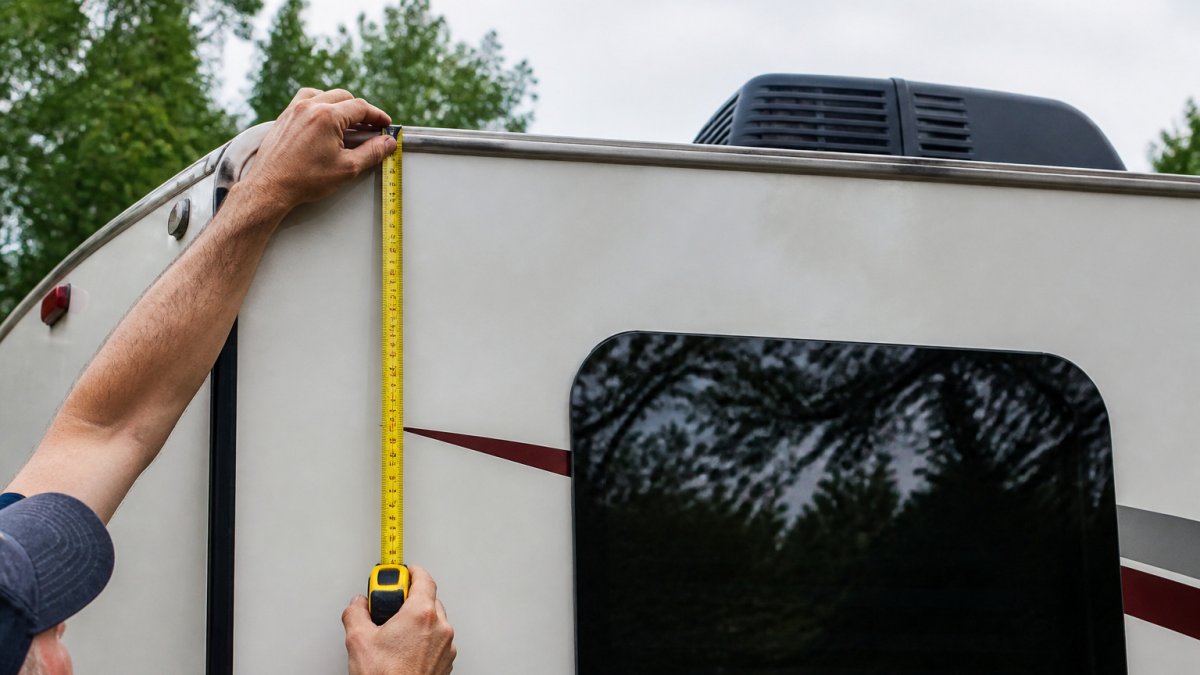
Stand the tape measure on the ground next to the RV's rear tire. Run it straight up to the highest point on the roof, keeping the tape vertical. Record the number.
Including Roof-Mounted Air Conditioners, Vents, and Antennas
Roof gear adds height that many owners forget, so when you measure RV carport clearance, check for these items:
- Air conditioner units
- Roof vents and vent covers
- TV or satellite antennas
- Solar panel mounts or cargo racks
Measure the top of each item, not just the roof surface. Whatever sticks up highest sets your minimum height.
Max Steel Buildings notes that a carport height of 12 to 14 feet is generally recommended for RVs, but you should still measure your own rig from the ground to its highest fixed point (RV Carport Height Guide: How Tall Should Your RV Cover Be?). Max Steel Buildings RV cover height guidance
Step 2: Measure the Overall Length and Allow for Access
Overall length is the distance from the front bumper or nose to the rear bumper. Measure in a straight line along the RV's centerline.
Add extra room beyond this number. You need space to open doors, reach the hitch area, and step around the rig. Many owners add 2 to 3 feet at each end for comfortable access. Plan for more if you tow a trailer or carry a bike rack.
Step 3: Measure Width Including Mirrors and Slide-Outs
Width is where most measurement errors happen. The body of the RV may be narrower than the side mirrors, and slide-outs can push the width wider when they are open.
Measure width in three passes, and write down all three numbers:
- Body width, mirrors folded in. Run the tape across the widest fixed point of the body, usually the rear bumper or the sidewall at the wheels. This is your baseline.
- Full width, mirrors extended. Have a helper hold the tape at the outer edge of one mirror and read to the outer edge of the other. Mirrors on a Class A motorhome commonly add 12 to 18 inches total versus body width; on a Class C or travel trailer the add is often 8 to 12 inches. Measure yours rather than assuming.
- Width with slide-outs extended. If you plan to open slide-outs while parked under the carport, measure from the outer face of one extended slide to the outer face of the opposite side (or to the opposite wall if only one side has a slide). A single slide-out commonly adds 18 to 36 inches to one side.
Use the widest number that matches how you actually park. If you always fold mirrors and keep slides retracted under the shelter, order to the folded-mirror width plus clearance. If you open slides under cover, order to the extended-slide width.
Then add driving clearance. A common pattern is to keep at least 12 inches of total side clearance, roughly 6 inches per side, beyond the widest point so you can pull in without touching the posts.
- Measure body width with mirrors folded in
- Measure full width with mirrors extended
- Measure with slide-outs open if you use them while parked
- Add 12 inches minimum total clearance; 18 to 24 inches for angled approaches
Record the three width numbers on your worksheet before moving to height and length, you will compare them against the carport's advertised width and its usable opening width in the verification step.
Step 4: Add Safety Clearance and Plan Your Carport Height
Do not order a carport that matches your measured height exactly. Add safety clearance above the highest point. A few extra inches prevents roof gear from rubbing the top beam during wind or when you pull in at an angle.
Next, consider leg or sidewall height. A taller sidewall gives more usable headroom, especially for vehicles with high roof racks. Roof pitch also matters. A pitched roof gives more clearance at the peak than at the edges, so check the peak height when comparing options.
Here is a simple way to plan:
- Start with your overall height
- Add 6 to 12 inches of safety clearance
- Choose a leg height that gives that total clearance at the sidewall
- Confirm peak height if you want extra room in the middle
Converting Your Measurements to Standard RV Carport Dimensions
Your measurements are rarely an exact standard size. Use the numbers you recorded to pick the next size up for each dimension. For more on choosing carport dimensions for RV storage, see our dedicated guide.
Round length up to the nearest standard length. Round width up to the nearest standard width. Round height up using the clearance you planned in Step 4. This keeps you from undersizing.
Use this worksheet to organize your numbers:
| Measurement | Your RV | Add For | Order Size |
|---|---|---|---|
| Overall height | ____ ft | Roof gear, clearance | ____ ft |
| Overall length | ____ ft | Access room | ____ ft |
| Width (mirrors out) | ____ ft | Driving clearance | ____ ft |
| Slide-outs open | ____ ft | Only if parked open | ____ ft |
Worked example: An RV measures 12 feet 4 inches tall with the air conditioner, 31 feet long, and 9 feet 2 inches wide with mirrors out. Adding 9 inches of height clearance, 6 feet of length for access, and 2 feet of width, the order targets roughly 13 feet 1 inch tall, 37 feet long, and 11 feet 2 inches wide.
Verifying Your Measurements and Site Conditions Before Ordering
The step that actually prevents ordering mistakes is verification: comparing your measured numbers against the carport's real opening dimensions and your site's real conditions. Do this before you place an order.
Confirm the numbers, not just the vehicle
Measure again on a different day, or ask a helper to confirm the height at the highest point. Re-check the three width numbers (folded mirrors, extended mirrors, slides out) and the length including any hitch or rear rack. Small differences between two measurement passes usually mean the RV was not on level ground the first time.
Distinguish advertised dimensions from usable entrance clearance
This is the gap most buyers miss. Leg height, roof peak, and entrance opening clearance are three different measurements:
- Leg (sidewall) height is the height at the outer post. It is what most listings quote.
- Roof peak is the highest point at the center of a pitched roof. It is always higher than leg height.
- Entrance opening clearance is the actual vertical gap you drive through at the front, and it can be lower than leg height if roof framing, braces, or a horizontal truss crosses the opening.
Ask the manufacturer for the entrance opening height and width, not just the nominal size. A carport listed as 12 feet tall at the leg may have an opening several inches lower once framing is included. Compare your tallest fixed point plus safety clearance against the opening height, not the leg height.
Check the site, not just the shelter
Walk the site where the carport will stand and note:
- Slope and uneven ground. A sloped approach changes the effective entrance height as the RV noses in. Measure ground-to-opening at the lowest point of the approach, not at the flattest spot.
- Turn and backing room. Confirm you can swing the RV into the opening. A long motorhome needs a wider approach apron than a travel trailer; measure the clear space in front of the entrance.
- Obstacles. Note trees, power lines, fences, and utility boxes that limit where posts can go or how high the structure can be.
- Setbacks and local requirements. Check property-line setbacks and any local rules for accessory structures before finalizing placement.
- Surface and anchoring. Dirt, gravel, and concrete each need a different anchoring approach. Know your surface before you order so the installer brings the right anchors.
Final pre-order checklist
- Overall height measured to the highest fixed point (including roof gear)
- Safety clearance added above that height
- Length measured bumper to bumper, plus access room at each end
- Width measured folded, extended, and with slides out
- Entrance opening height and width confirmed with the manufacturer
- Approach slope and turn room checked
- Surface type and anchoring method confirmed
- Setbacks and local requirements reviewed
Once every box is checked, you have the numbers and site details needed to order with confidence, and to talk through any edge cases with the installer before delivery.
Get Your Custom-Sized RV Carport Quote Today
You now have the numbers you need to size a carport for your RV. Metal Carport Depot LLC builds custom sizes at no extra charge, and delivery and professional installation are included in the price. Browse our 12' wide boxed eave metal carports for smaller rigs, or see our 26' wide triple-wide options for larger motorhomes and combinations. Call 1-800-324-5315 to talk through your measurements and get a quote.
Frequently Asked Questions
How much extra space do I need around my RV for a carport?
Plan for more room than the RV alone. Add clearance above the highest fixed point so you can open the roof vents and clear accessories, and leave enough side space to open doors and step out safely. Allow additional length in front or behind the RV so you can drive in and out without scraping the posts or the roof. Measure the usable entrance opening as well as the advertised carport dimensions, because the posts and frame reduce the space you actually have to pull through.
What is the standard height for an RV carport?
A carport height of 12 to 14 feet is generally recommended for most RVs, but the correct height depends on your vehicle. Measure from the ground to the highest fixed point on the RV, which often includes a roof-mounted air conditioner, vent, or antenna. Then add a safety margin above that figure. Do not rely on the height of the RV's body alone, because roof-mounted equipment frequently sets the true clearance requirement.
How do I measure the width of my RV including slide-outs?
Measure the widest point of the RV with the slide-outs retracted, then measure again with them extended. Include the side mirrors, since they usually stick out past the body and can strike posts or frame members. Use the extended figure to decide whether the carport can accommodate the RV when the slides are open, and add side clearance so you can open doors and walk around the vehicle. Take the measurement with a helper and a tape measure to reduce errors.